In this blog post, we’re going to show you how to set up and utilize on-demand macOS VMs for iOS building and testing inside of Azure DevOps Pipelines using Veertu’s Anka Build solution. Microsoft has a vast library of services under Azure DevOps which support teams in planning work, collaborating on code, and automating building and testing. We’d love to tell you all about them, but we’ll focus specifically on Pipelines and self-hosted Azure Pipelines Agents. You can find more information about Azure DevOps on their documentation site.
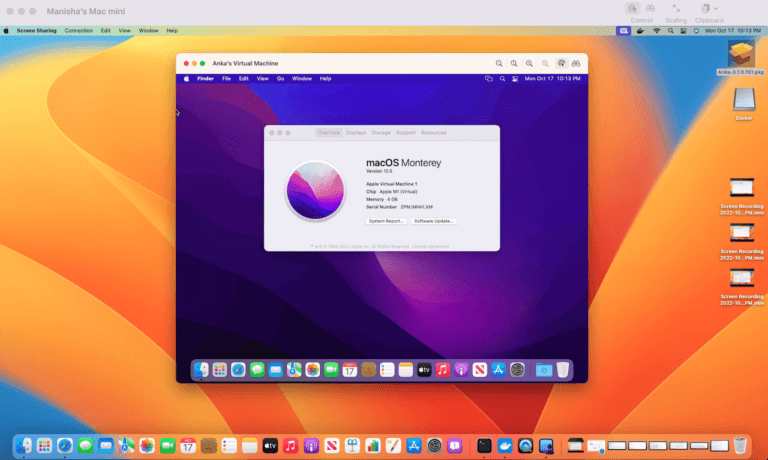
Anka Build virtualization solution enables the creation and management of macOS VMs on mac host machines in a container-like manner. With Anka Build, you can create macOS VM images/templates, store and manage them in a central Anka registry, and provision on-demand instances on a cluster of either local or external mac hardware. Another huge benefit of Anka is the ability to run multiple VMs on a single machine, easily doubling the macOS fleet your team uses for automation.
Note: For this guide, you’ll need a single macOS machine to download, configure, and register the Azure Pipelines Agents on. It needs to have the Anka package installed, and at least one VM Template/Tag stored on it. You’ll also need an Azure DevOps Project set up within your Azure organization.
Let’s start with a description of Azure Pipelines. From the What is Azure Pipelines? documentation:
“Azure Pipelines automatically builds and tests code projects to make them available to others. It works with just about any language or project type. Azure Pipelines combines continuous integration (CI) and continuous delivery (CD) to test and build your code and ship it to any target.”
One of the great parts of Azure Pipelines is its use of YAML to define jobs and steps. This provides a similar experience to Github Actions (see our blog on how that works) and several other CI/CT/CD tools that speed up the adoption or migration into Azure DevOps. Here is the example YAML we’ll describe:
trigger:
  - main

pool: 'Anka macOS'

parameters:
  - name: anka_vm_name
    displayName: "Anka VM Template Name or UUID"
    type: string
    default: '11.5.2'
  - name: anka_vm_tag_name
    displayName: "Anka VM Template Name or UUID"
    type: string
    default: 'vanilla+port-forward-22+brew-git'
  - name: lane_name
    displayName: "Fastlane Lane Name"
    type: string
    default: ''
  - name: lane_parameters
    displayName: "Fastlane Parameters"
    type: string
    default: ''
  - name: publishFolder
    displayName: "Artifact Publish Folder"
    type: string
    default: ''
  - name: artifactFolderName
    displayName: "Artifact Folder Name"
    type: string
    default: 'Artifacts'
  - name: publishTest
    displayName: "Publish Test Name"
    type: string
    default: ''
  - name: publishCodeCoverageFolderName
    displayName: "Publish Code Coverage Name"
    type: string
    default: ''
  - name: rubyVersion
    displayName: "Ruby Version"
    type: string
    default: 'ruby-2.7.0'
  - name: match_pass_key
    displayName: "Publish Code Coverage Name"
    type: string
    default: 'Password Here'
  - name: git_token_key
    displayName: "Git Token"
    type: string
    default: 'Token Here'

steps:

  - task: Bash@3
    displayName: ' Create Anka VM'
    inputs:
      targetType: 'inline'
      script: |
        # This script will get the latest anka template, we need to make sure only one template is pulled at a time on a machine.

        # First we'll create a lock-file, because pulling multiple VMs at the same time might cause issues.
        # This is not really thread safe... but it's better then nothing
        while [[ -f "/tmp/registry-pull-lock-${{ parameters.anka_vm_name }}" ]]; do
          echo "Lock file found... Another job on this node is pulling a tag for ${{ parameters.anka_vm_name }} and pulling a second will potentially cause corruption. Sleeping for 20 seconds..."
          sleep 20
        done

        # Create lock file
        touch "/tmp/registry-pull-lock-${{ parameters.anka_vm_name }}"

        # Pull latest version (if no tag specified) (requires a running Registry)
        # anka registry pull ${{ parameters.anka_vm_name }} -t ${{ parameters.anka_vm_tag_name }}

        # Clone template for a VM
        anka clone ${{ parameters.anka_vm_name }} ado-fastlane+$(Build.Repository.Name)_$(Build.SourceBranchName)_$(Build.SourceVersion)_$(Build.BuildNumber)_$(Agent.Name)

  - task: Bash@3
    displayName: ' Unlock Anka VM'
    condition: always()
    inputs:
      targetType: 'inline'
      script: |
        # Make sure to always delete the lock file
        rm "/tmp/registry-pull-lock-${{ parameters.anka_vm_name }}"

  - task: Bash@3
    displayName: ' Prepare Anka VM working directory'
    inputs:
      targetType: 'inline'
      script: |
        # Start the VM
        anka start ado-fastlane+$(Build.Repository.Name)_$(Build.SourceBranchName)_$(Build.SourceVersion)_$(Build.BuildNumber)_$(Agent.Name)

        # Copy all files from ADO work folder to ~/work/ inside the VM
        anka cp -fa ./ ado-fastlane+$(Build.Repository.Name)_$(Build.SourceBranchName)_$(Build.SourceVersion)_$(Build.BuildNumber)_$(Agent.Name):./work/

  - task: Bash@3
    displayName: ' Run fastlane in Anka VM'
    inputs:
      targetType: 'inline'
      script: |
        anka run --env --no-volume --wait-network --wait-time ado-fastlane+$(Build.Repository.Name)_$(Build.SourceBranchName)_$(Build.SourceVersion)_$(Build.BuildNumber)_$(Agent.Name) bash -c "cd work

        # Setting up all everything
        # Set ENVs, configure Git with secrets etc.
        # Make sure Ruby is correct version

        # Run fastlane
        bundle install
        bundle exec fastlane ${{ parameters.lane_name }} ${{ parameters.lane_parameters }}"

  - task: Bash@3
    displayName: " Copy results from Anka VM"
    inputs:
      targetType: 'inline'
      script: |
        # Copy results back to the host
        anka cp -fa ado-fastlane+$(Build.Repository.Name)_$(Build.SourceBranchName)_$(Build.SourceVersion)_$(Build.BuildNumber)_$(Agent.Name):work/ $(Build.ArtifactStagingDirectory)/../s/vm_result/

  - ${{ if ne(parameters.publishFolder, '') }}:

    - task: PublishBuildArtifacts@1
      displayName: ' Publish artifacts'
      inputs:
        pathToPublish: '$(Build.ArtifactStagingDirectory)/../s/vm_result/${{ parameters.publishFolder }}'
        artifactFolderName: '${{ parameters.artifactFolderName }}'

  - ${{ if ne(parameters.publishTest, '') }}:

    - task: PublishTestResults@2
      displayName: ' Upload test results'
      inputs:
        testResultsFormat: 'JUnit'
        testResultsFiles: '$(Build.ArtifactStagingDirectory)/../s/vm_result/${{ parameters.publishTest }}'
        testRunTitle: 'Unit Tests'

  - ${{ if ne(parameters.publishCodeCoverageFolderName, '') }}:

    - task: UseDotNet@2
      displayName: ' Setting up Code Coverage'
      inputs:
        version: '5.0.x'
    - task: publishCodeCoverageFolderNameResults@1
      displayName: ' Upload code coverage results'
      inputs:
        codeCoverageTool: 'Cobertura'
        summaryFileLocation: '$(Build.ArtifactStagingDirectory)/../s/vm_result/${{ parameters.publishCodeCoverageFolderName }}/xml/cobertura.xml'

  - task: Bash@3
    displayName: " Cleanup Anka VM"
    condition: always()
    inputs:
      targetType: 'inline'
      script: |
        # Always delete the VM
        anka delete --yes ado-fastlane+$(Build.Repository.Name)_$(Build.SourceBranchName)_$(Build.SourceVersion)_$(Build.BuildNumber)_$(Agent.Name)
Cleanup Anka VM"
condition: always()
inputs:
targetType: 'inline'
script: |
# Always delete the VM
anka delete --yes ado-fastlane+$(Build.Repository.Name)_$(Build.SourceBranchName)_$(Build.SourceVersion)_$(Build.BuildNumber)_$(Agent.Name)The most recent version of the above code can be found on our Examples Github Repo. At the very top of the file, we set which pool of registered agents to use. You’ll want to download the latest Azure Pipelines Agent version from the official Github repo. Once you’ve unpacked the agent on the machine, you can configure/register it as a self-hosted agent to the “Anka macOS” pool (you may have to create the pool manually) by following the official documentation.
Once registered to the pool, we can now run the YAML above in your Pipelines. Feel free to modify it; especially if you want to pull from your Anka Build Registry before cloning the VM Template (uncomment the pull line). The parameters section defines the default values to use/interpolate throughout the various steps and commands. You can override these manually when running the pipeline, as seen below:
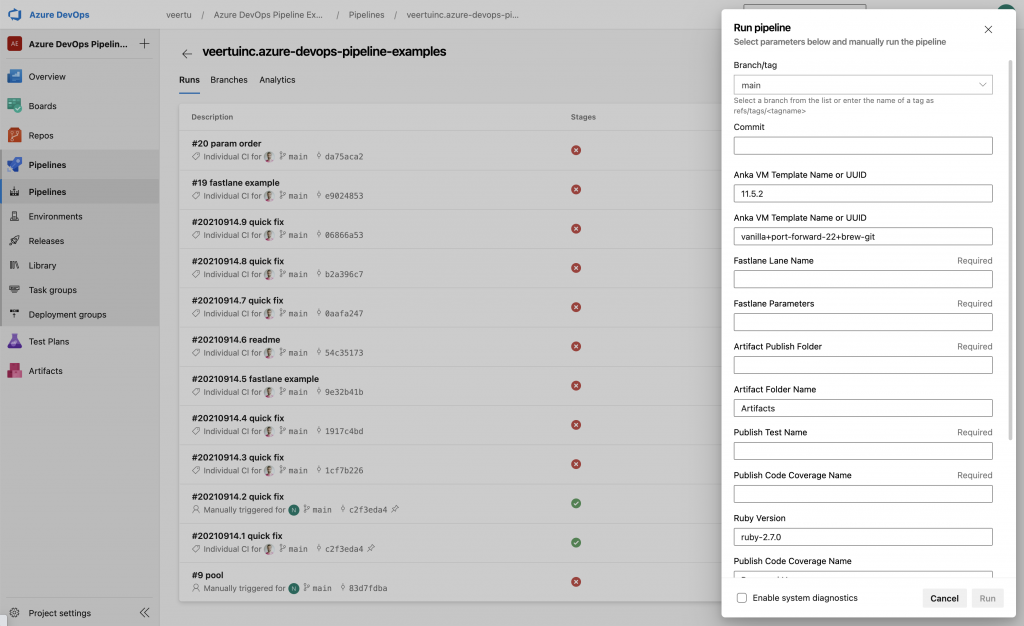
Once running, the first few steps in the YAML will prepare an Anka VM on the machine you registered your agent. It will clone from the VM Template to create a copy that will run your job. We call this the VM Template because you shouldn’t use it directly to avoid polluting the VM for subsequent runs.
Once the VM is running, we copy the contents of the current host directory into the VM. The agent and Azure Pipelines automatically clone your project repo into the current working directory on the host.
Once the VM is prepared, we can then execute our commands through anka run on the host’s CLI. For complex commands, I recommend including them in your repo inside of a bash script, then executing them in the anka run command. However, you can see that all we’re doing in the example is install/update ruby gems and kick-off fastlane.
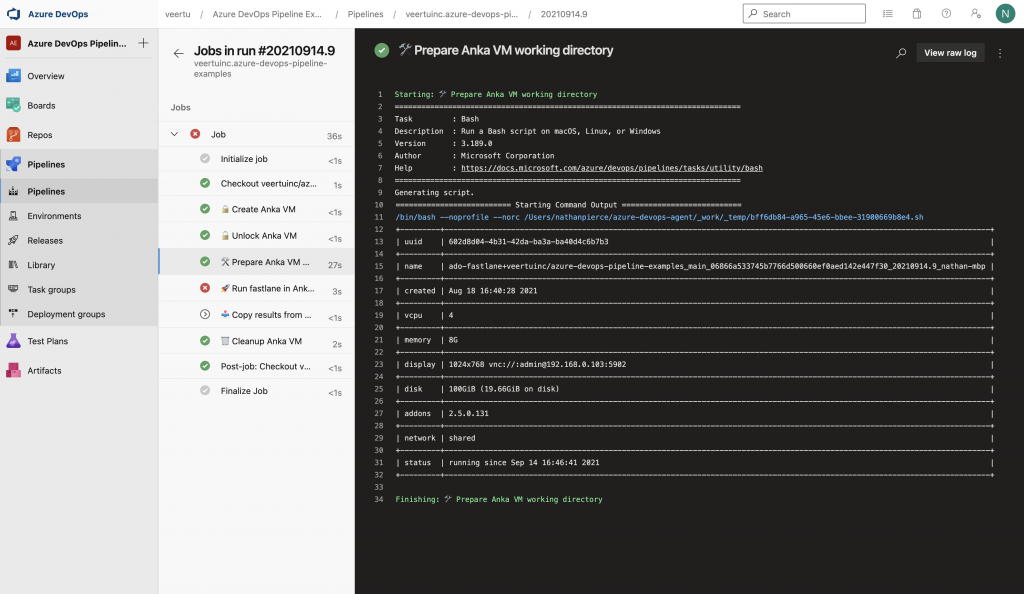
The rest of the steps are an example of how you can copy the results back out into the host so that the agent can upload them as artifacts.
Finally, since we’re spinning up a fresh VM on each run of the pipeline, we need to ensure that the last step/task cleans it up. This is achieved using the condition: always() on the task, and performing anka delete.
These days most developers are familiar with YAML, and since the pipeline yml file exists in your project repo, developers have the opportunity to modify the test and build commands on their own.You can even have your developers download the free Anka Develop client so that they can run an Anka VM on their local machine and ensure that the various steps work. Defining your steps and tasks to prepare the VM within the YAML may seem like a lot of complexity. However, we believe the ability to quickly adapt, vs waiting on features and bug fixes for an official Azure Pipelines Task, is worth it.
If you have any questions about using on-demand Anka VMs in Azure DevOps Pipelines, please reach out to [email protected].
Have any examples of using Azure DevOps Pipelines with Anka? We’d love for you to submit it as a PR in our examples repo.
