In the dynamic world of software development, a streamlined Continuous Integration (CI) pipeline is the backbone of enterprises delivering reliable and efficient products. For macOS environments, the challenges of setting up and maintaining automation tools can be daunting. There are a handful of options and a lot of them are too limited, too different from what teams expect with Linux/Docker, or too new for seasoned organizations and teams to rely on.
Veertu has been at the forefront of macOS virtualization, providing the only enterprise-grade Intel based macOS Virtualization CI and automation tooling for many years. Since the introduction of Apple Silicon / ARM, we’ve taken our experience as the leader in the space and innovated with our customers to push what is possible for our customer use-cases. One of those use-cases is ephemeral on-prem / self-hosted GitHub Actions runners, all running on Anka Virtualization.
The GitHub Actions Challenge
Veertu has a reputation of working with our customers to provide them with a perfect fit for their needs. Back in 2024 we were approached by several customers attempting to work with Github Actions and needing some changes to our older legacy actions plugins that just weren’t possible based on its core design. We quickly moved to collect the requirements from each and devise a solution that covers all of their needs.
If you aren’t already familiar, GitHub Actions has a workflow yml file approach, allowing teams to define their workflows in YAML and indicate what sort of “runner” to target and run commands or “actions” on. These YAML files can quickly get out of control with complexity and be hard to manage for developers that just want to code their apps and kick off test tooling. Not only is this a secret/auth/credential nightmare, our customers needed a solution that silos Anka from GitHub Actions as much as possible so that teams don’t end up being distracted from their coding and testing, dealing with infrastructure issues and configuration. It also needed to provide on-demand and ephemeral macOS runners with as little effort as possible from developers.
Introducing Anklet
Ultimately, Anklet is designed as the Next-Gen macOS GitHub Actions for Enterprises and handles macOS-specific CI challenges by abstracting complexities (like configuration, VM management, and job handling) away from the developers, allowing infrastructure, operations, and DevOps teams to provide on-demand/ephemeral Anka VMs as a service to their organizations without developers needing any knowledge of the underlying Anka software running their jobs.
Anklet in Action: Simplifying GitHub Actions macOS CI/CD
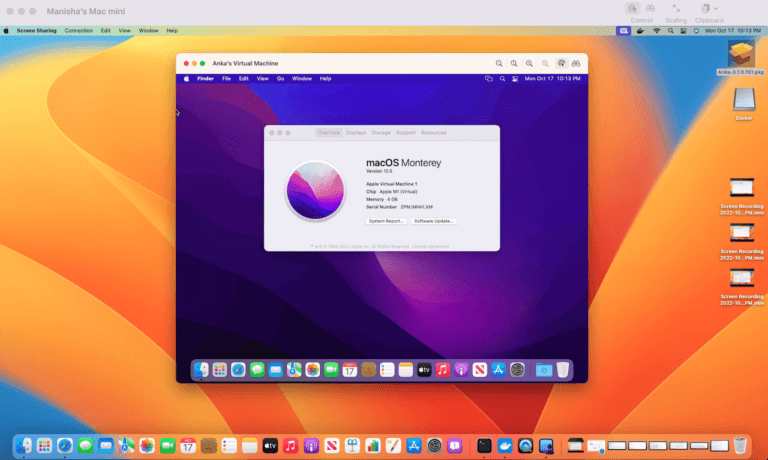
You may already know that Anka Virtualization is a powerful tool for teams to achieve a docker-like approach with their macOS automation and CI/CD. Teams create VM Templates with their dependencies installed, push them to a registry, then spin up ephemeral macOS VMs for their jobs using any number of plugins we offer (or create your own!).
Anklet allows us at Veertu to publish plugins that communicate with various CI platforms, like Github Actions. It features a straightforward configuration, enabling the definition of custom plugins—created by Veertu or the community—that manage all the necessary logic for handling jobs within a specific CI platform. These plugins handle host-side operations, such as automatically setting up a macOS VM with a registered agent, ready for the CI platform to execute commands in.
At the time of writing this, we have our first plugins available for GitHub Actions. There is a Webhook Receiver and Workflow Run Job Handler plugin that work in combination. We’ll go over how to set up both below.
Getting Started with Anklet and GitHub Actions
We’re going to use a single macOS host for the setup. This allows us to keep things simple and have one Anklet run everything we need. In a production setup, you’d likely instead use a combination of Linux and macOS hosts to run Anklet Github Actions plugins.
Additionally, we will not be using the Anka Build Cloud Registry and all you’ll need to do is install the Anka CLI and create a VM Template so that it’s ready to use on the host.
With the GitHub Actions plugins, there is a Receiver Plugin and a Handler Plugin.
- The GitHub Actions Receiver Plugin is a web server that listens for webhooks GitHub sends and then places the events in the database/queue. It can run on Mac and Linux.
- The GitHub Actions Handler Plugin is responsible for pulling a job from the database/queue, preparing a macOS VM, and registering it to the repo’s action runners so it can execute the job inside. It can only run on macOS as it needs access to the Anka CLI.
Prepare Your Anklet Base
- Set up your redis database on the host.
- Download the binary from the releases page.
- Create a
~/.config/anklet/config.ymlfile with the following contents. We’ll configure the plugins next.
---
work_dir: /tmp/
pid_file_dir: /tmp/
# If you want to use the same database for all your plugins, you can set them below:
# global_database_url: localhost
# global_database_port: 6379
# global_database_user: ""
# global_database_password: ""
# global_database_database: 0
# global_private_key: /Users/{YOUR USER HERE}/.private-key.pem # If you use the same key for all your plugins, you can set it here.
# plugins_path: ~/.config/anklet/plugins/ # This sets the location where scripts used by plugins are stored; we don't recommend changing this.
plugins:
Uncomment and configure the global_database_* to match the values of your database.
Setup Receiver
The most recent and verbose version of this guide can be found on GitHub.
What you need:
- An active database the Receiver can access. It needs to be the same database as the GitHub Handler Plugin. [Setup Guide]
- Some sort of Auth method like a PAT or a GitHub App for the repo you want to receive webhooks for. They need
Administration,Webhooks, andActionsset toRead and write. - A way to receive webhook POSTs. This can be a public URL or IP that points to the server running the Anklet GitHub Receiver. GitHub will send the webhook to this endpoint over the internet.
In the config.yml, you can define the github_receiver plugin as follows:
NOTE: Plugin name MUST be unique across all hosts and plugins in your Anklet cluster.
---

. . .

plugins:
  - name: GITHUB_WEBHOOK_RECEIVER_1
    plugin: github_receiver
    hook_id: 489747753
    port: 8080
    secret: 12345
    private_key: /Users/{YOUR USER HERE}/private-key.pem
    app_id: 949431
    installation_id: 52970581
    # repo: anklet # Optional; if you want to receive webhooks for a specific repo and not at the org level
    owner: veertuinc
Some things to note:
- If you leave off
repo, the receiver will be an organization level receiver. - The receiver must come FIRST in the
plugins:list. Do not place it after other plugins. - IMPORTANT: On first start, it will scan for failed webhook deliveries for the past 24 hours and send a re-delivery request for each one. This is to ensure that all webhooks are delivered and processed and nothing in your plugins are orphaned or database. Avoid excessive restarts or else you’ll eat up your API limits quickly. You can use
skip_redeliver: trueto disable this behavior.
Once configured, you can run Anklet and, if everything is configured properly, you should see logs like this:
{"time":"2025-01-06T10:38:23.198354-06:00","level":"INFO","msg":"starting plugin","ankletVersion":"0.11.2","pluginName":"GITHUB_WEBHOOK_RECEIVER"}

{"time":"2025-01-06T10:38:23.199399-06:00","level":"INFO","msg":"listing hook deliveries for the last 24 hours to see if any need redelivery (may take a while)...","ankletVersion":"0.11.2","pluginName":"GITHUB_WEBHOOK_RECEIVER","plugin":"github_receiver"}

{"time":"2025-01-06T10:38:27.186532-06:00","level":"INFO","msg":"started plugin","ankletVersion":"0.11.2","pluginName":"GITHUB_WEBHOOK_RECEIVER","plugin":"github_receiver"}
It should now be ready to receive webhooks! You can now set up a webhook to send events to this receiver.
Webhook Trigger Setup
/jobs/v1/receiver – This is the endpoint that Github will send the webhook to. This is where the receiver will receive the webhook and store it in the database.
- Find your repo (or organization) in github.com
- Click on
Settings - Click on
Webhooks - Click on
Add webhook - Set the
Payload URLto the Public IP or URL that points to the server running the Anklet Github Receiver +/jobs/v1/receiver. So for example:http://{PUBLIC IP OR URL}:8080/jobs/v1/receiver - Set
Content Typetoapplication/json - Set the
Secretto thesecretfrom theconfig.yml SSL verificationis up to you.- Choose
Workflow jobsas the event to trigger/receive - Make sure
Activeis enabled - Click on
Add webhook
Once added, GitHub will now send any Workflow Job events to the Receiver to consider.
You can now stop Anklet (ctrl+c) as we’re going to add more plugins to it.
Setup Handler
The most recent and verbose instructions can be found on GitHub.
What you need:
- An Anka VM on the same host Anklet is running.
- A database to pull the queued-up jobs. Use the same as the Receiver.
The GitHub Handler Plugin is responsible for pulling a job from the database queue, preparing a macOS VM, and registering it to the GitHub repo or organization as an action runner so it can execute the job inside.
Note: The GitHub Handler Plugin will pull jobs from the database queue in order of creation. The GitHub Webhook Receiver Plugin will place the jobs in the database queue in the order they’re created.
Let’s add the following to our config.yml:
---

. . .

plugins:

. . .

  - name: RUNNER1
    plugin: github
    # token: github_pat_XXX # Instead of PAT, you can create a github app for your org/repo and use its private_key instead.
    private_key: /path/to/private/key
    app_id: 12345678 # Org > Settings > Developer settings > GitHub Apps > New GitHub App
    installation_id: 12345678 # You need to install the app (Org > Settings > Developer settings > GitHub Apps > click Edit for the app > Install App > select your Repo > then check the URL bar for the installation ID)
    registration: repo
    # repo: anklet # Optional; only needed if registering a specific runner for a repo, otherwise it will be an org level runner.
    owner: veertuinc
    # runner_group: macOS # requires Enterprise github
    skip_pull: true # prevents pulling from the Anka Build Cloud Registry
You’ll of course need to update the values appropriately. Once updated, you can then start the anklet service and check the logs to see if it worked. They should look something like:
{"time":"2025-01-07T17:30:58.646591-06:00","level":"INFO","msg":"starting anklet","ankletVersion":"dev"}
{"time":"2025-01-07T17:30:58.646953-06:00","level":"INFO","msg":"metrics server started on port 8080","ankletVersion":"dev"}
{"time":"2025-01-07T17:30:58.74502-06:00","level":"INFO","msg":"starting plugin","ankletVersion":"dev","pluginName":"RUNNER1"}
{"time":"2025-01-07T17:30:58.789134-06:00","level":"INFO","msg":"checking for jobs....","ankletVersion":"dev","pluginName":"RUNNER1","plugin":"github","owner":"veertuinc"}
If this is what you see, you can now configure a workflow to request a macOS VM from the anklet service.
Create A GitHub Actions Workflow
We’ll keep the example simple. This guide assumes the host machine already has an Anka VM on the host we can clone from and run for your jobs.
You can read over the official GitHub Actions Workflow guide too.
What you need:
- An Anka VM on the same host Anklet is running.
You’ll go into your GitHub repo and create .github/workflows/test.yml under the root.
name: 'testing-anklet'
on:
  workflow_dispatch:

jobs:
  testJob:
    runs-on: [
      "anka-template:{YOUR ANKA VM UUID HERE}",
    ]
    steps:
      - uses: actions/checkout@v3
      - run: |
          ls -laht
          sw_vers
          hostname
          echo "123"
The anka-template needs to be the UUID of the VM to target. You can get this by running anka list on the host where you created the VM.
Once that’s saved, you can now kick off the workflow run from the github UI and watch the Anklet logs to see the progress. It should indicate what it’s doing to run the job inside of the VM.
Monitoring
Anklet also comes with built in Metrics for both Prometheus and raw JSON. Not only does each instance of Anklet have metrics endpoints at :8080/metrics/v1?format=prometheus and :8080/metrics/v1?format=json, but you can also run a separate Anklet as an aggregator service.
Each Anklet instance will store its metrics for each plugin to the database. An Anklet metrics aggregation service will then scan the DB for these and place them into a single endpoint you can consume.
You can find documentation about regular metrics and the aggregator service on our github.
Here is an example of the prometheus metrics from the aggregator:
plugin_status{name=RUNNER1,owner=veertuinc} idle
plugin_last_successful_run{name=RUNNER1,owner=veertuinc,job_url=https://api.github.com/repos/veertuinc/anklet/actions/jobs/35269653289} 2025-01-07T11:59:21-06:00
plugin_last_failed_run{name=RUNNER1,owner=veertuinc,job_url=https://api.github.com/repos/veertuinc/anklet/actions/jobs/35269648602} 2025-01-07T11:56:47-06:00
plugin_last_canceled_run{name=RUNNER1,owner=veertuinc,job_url=https://github.com/veertuinc/anklet/actions/runs/12656636499/job/35269646979} 2025-01-07T11:55:53-06:00
plugin_status_since{name=RUNNER1,owner=veertuinc,status=idle} 2025-01-07T11:52:47-06:00
plugin_total_ran_vms{name=RUNNER1,plugin=github,owner=veertuinc} 5
plugin_total_successful_runs_since_start{name=RUNNER1,plugin=github,owner=veertuinc} 4
plugin_total_failed_runs_since_start{name=RUNNER1,plugin=github,owner=veertuinc} 1
plugin_total_canceled_runs_since_start{name=RUNNER1,plugin=github,owner=veertuinc} 1
host_cpu_count{name=RUNNER1,owner=veertuinc} 12
host_cpu_used_count{name=RUNNER1,owner=veertuinc} 1
host_cpu_usage_percentage{name=RUNNER1,owner=veertuinc} 12.390755
host_memory_total_bytes{name=RUNNER1,owner=veertuinc} 38654705664
host_memory_used_bytes{name=RUNNER1,owner=veertuinc} 24571248640
host_memory_available_bytes{name=RUNNER1,owner=veertuinc} 14083457024
host_memory_usage_percentage{name=RUNNER1,owner=veertuinc} 63.565996
host_disk_total_bytes{name=RUNNER1,owner=veertuinc} 994662584320
host_disk_used_bytes{name=RUNNER1,owner=veertuinc} 621074538496
host_disk_available_bytes{name=RUNNER1,owner=veertuinc} 373588045824
host_disk_usage_percentage{name=RUNNER1,owner=veertuinc} 62.440726
last_update{name=RUNNER1,owner=veertuinc} 2025-01-07T12:01:47-06:00
plugin_status{name=RUNNER2,owner=veertuinc} idle
plugin_last_successful_run{name=RUNNER2,owner=veertuinc,job_url=https://api.github.com/repos/veertuinc/anklet/actions/jobs/35269653543} 2025-01-07T11:59:29-06:00
plugin_last_failed_run{name=RUNNER2,owner=veertuinc,job_url=} 0001-01-01T00:00:00Z
plugin_last_canceled_run{name=RUNNER2,owner=veertuinc,job_url=https://github.com/veertuinc/anklet/actions/runs/12656636751/job/35269647515} 2025-01-07T11:55:56-06:00
plugin_status_since{name=RUNNER2,owner=veertuinc,status=idle} 2025-01-07T11:52:48-06:00
plugin_total_ran_vms{name=RUNNER2,plugin=github,owner=veertuinc} 5
plugin_total_successful_runs_since_start{name=RUNNER2,plugin=github,owner=veertuinc} 5
plugin_total_failed_runs_since_start{name=RUNNER2,plugin=github,owner=veertuinc} 0
plugin_total_canceled_runs_since_start{name=RUNNER2,plugin=github,owner=veertuinc} 1
host_cpu_count{name=RUNNER2,owner=veertuinc} 12
host_cpu_used_count{name=RUNNER2,owner=veertuinc} 1
host_cpu_usage_percentage{name=RUNNER2,owner=veertuinc} 12.390755
host_memory_total_bytes{name=RUNNER2,owner=veertuinc} 38654705664
host_memory_used_bytes{name=RUNNER2,owner=veertuinc} 24571248640
host_memory_available_bytes{name=RUNNER2,owner=veertuinc} 14083457024
host_memory_usage_percentage{name=RUNNER2,owner=veertuinc} 63.565996
host_disk_total_bytes{name=RUNNER2,owner=veertuinc} 994662584320
host_disk_used_bytes{name=RUNNER2,owner=veertuinc} 621074538496
host_disk_available_bytes{name=RUNNER2,owner=veertuinc} 373588045824
host_disk_usage_percentage{name=RUNNER2,owner=veertuinc} 62.440726
last_update{name=RUNNER2,owner=veertuinc} 2025-01-07T12:01:47-06:00
plugin_status{name=GITHUB_RECEIVER,owner=veertuinc} running
plugin_status_since{name=GITHUB_RECEIVER,owner=veertuinc,status=running} 2025-01-07T11:42:57-06:00
host_cpu_count{name=GITHUB_RECEIVER,owner=veertuinc} 12
host_cpu_used_count{name=GITHUB_RECEIVER,owner=veertuinc} 5
host_cpu_usage_percentage{name=GITHUB_RECEIVER,owner=veertuinc} 42.171734
host_memory_total_bytes{name=GITHUB_RECEIVER,owner=veertuinc} 38654705664
host_memory_used_bytes{name=GITHUB_RECEIVER,owner=veertuinc} 28486483968
host_memory_available_bytes{name=GITHUB_RECEIVER,owner=veertuinc} 10168221696
host_memory_usage_percentage{name=GITHUB_RECEIVER,owner=veertuinc} 73.694738
host_disk_total_bytes{name=GITHUB_RECEIVER,owner=veertuinc} 994662584320
host_disk_used_bytes{name=GITHUB_RECEIVER,owner=veertuinc} 623034486784
host_disk_available_bytes{name=GITHUB_RECEIVER,owner=veertuinc} 371628097536
host_disk_usage_percentage{name=GITHUB_RECEIVER,owner=veertuinc} 62.637773
last_update{name=GITHUB_RECEIVER,owner=veertuinc} 2025-01-07T12:01:46-06:00
Conclusion
In a world where time-to-market, reliability, and productivity define the success of software development teams, Veertu’s Anklet emerges as a game-changer. By simplifying macOS Continuous Integration pipelines, automating tedious workflows, and abstracting away complex VM management, Anklet empowers teams to focus on what truly matters—building exceptional software.
Whether you’re a small team seeking to streamline your CI processes or part of a large organization looking to scale macOS testing, Anklet offers the scalability, flexibility, and precision you need. Its seamless integration with tools like GitHub Actions and support for custom plugins makes it the ultimate tool for macOS CI automation.
Ready to redefine your macOS CI/CD workflows? Explore Anklet today and unlock new levels of development efficiency.


