In this blog, we’d like to show you how to build and test Metal Xcode projects with Anka.
Modern iOS and macOS applications use Apple Metal APIs to access GPU for graphics or intensive calculations. Starting in Anka version 2.3.2, Anka VMs support the Apple Metal framework in order to leverage the host’s GPU. Developers can not only utilize Metal APIs in their simulator testing but will also notice a much richer and more performant graphics experience.
This is currently only supported on Anka Big Sur VMs running on Big Sur Hosts.
One of the strengths of Anka is the ability to build and test your applications inside of an isolated/sandboxed macOS VM. This eliminates the need for managing dependencies for multiple projects on your laptop and potentially causes dependency collision, false-positive tests, and headaches. You can create your VM Templates from multiple macOS versions with specific dependencies installed and quickly switch between them or even revert them back to a clean version.
Recommendation: Alongside the Anka Virtualization technology, our Anka VM Github Action allows you to easily request a clone from a VM Template and automatically execute certain commands inside of it to run your builds and tests. This ensures consistency and eliminates potential human error which is all common after late nights and long hours.
Install the Anka Virtualization Package
To begin, you’ll need to install the Anka Virtualization package on your local machine. You can copy and paste the following into your terminal:
ANKA_VIRT_PKG_FILE_NAME=$(echo $(curl -Ls -r 0-1 -o /dev/null -w %{url_effective} https://veertu.com/downloads/anka-develop-latest) | cut -d/ -f4);
curl -S -L -o $ANKA_VIRT_PKG_FILE_NAME https://veertu.com/downloads/anka-develop-latest
sudo installer -pkg $ANKA_VIRT_PKG_FILE_NAME -tgt /
Once installed, you can confirm the Anka Develop license is available:
❯ anka license show
+--------------+-------------------------+
| license_type | com.veertu.anka.develop |
+--------------+-------------------------+
| status       | valid                   |
+--------------+-------------------------+
If you do not see the Anka Develop license, ensure that you’re using the required hardware: Macbook, Macbook Pro, or Macbook Air. If you do not have one of these hardware models, please obtain your trial license from https://veertu.com/getting-started-anka-trials/ or by contacting [email protected].
Create your Big Sur VM Template
Under your /Application directory or LaunchPad, find Anka and launch it. Once it’s open, you’ll find the “Create new VM” button. This will open a window allowing you to choose the Name and the Installer .app.
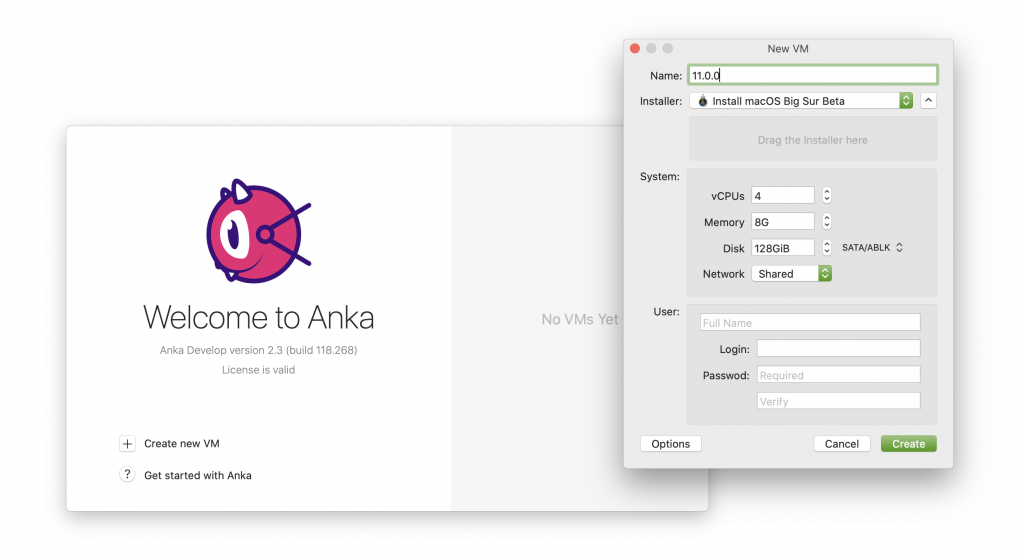
If you do not have the macOS installer, you have several options available to obtain it detailed in our documentation.
Once created, you will see the VM/Template available in the Anka window.

You can now start and stop the VM as many times as you wish. However, each start will create changes in the layering. What we want to do instead is keep this Template clean by first cloning it before we start or use it. Click on the VM Template name on the sidebar and then under the VM option on the menu bar, click on Clone.
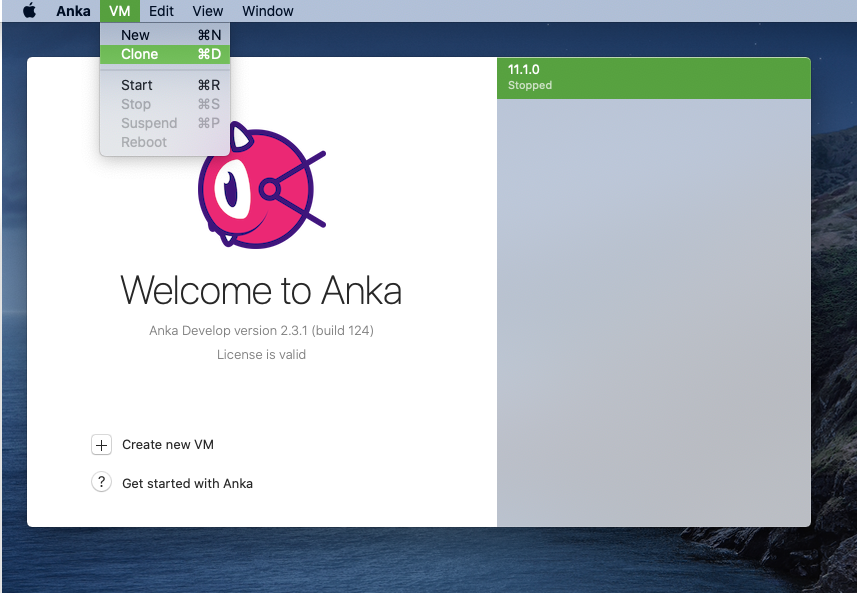
Once cloned, you can click on the VM name to change it to something that helps you identify it from the original VM Template.
Prepare your VM Template for Xcode and Metal
In order to install dependencies, you’ll need to double click on the cloned VM. This will start it and launch the Anka Viewer window. You’ll then be able to open the terminal and/or install apps from the App store. Here are the dependencies we need to install for running Metal apps:
- Ensure you have Big Sur for your OS version. Metal/PG does not work without it running on both the host machine and guest VM.
- Install the latest Xcode through the App Store.
- Open the terminal and execute the following:
sudo xcodebuild -license accept
/bin/bash -c "$(curl -fsSL https://raw.githubusercontent.com/Homebrew/install/HEAD/install.sh)"
brew install watch jq
The installation of watch and jq is optional, but I often use both of them while troubleshooting.
Once you’ve got your dependencies install and the VM ready to use, you’ll want to stop the VM and create another clone. However, before you do create another clone, you’ll need to enable ParaVirtualized Graphics (“PG”) with a terminal command:
anka modify 12.2-xcode12.4-metal-example set display -c pg
To disable, set display -c fbuf
Suspending VMs is not available once PG is enabled
This ensures that Apple Metal APIs are available inside of the VM and you get the best simulator/graphics performance.
We’re now ready to create the clone. The new clone will be what you work from to build and test that your app runs properly. Otherwise, if something is wrong, we need to modify the clone’s source VM Template and make sure the dependencies are set up properly before we clone and test again. If you’re curious, you can read over our detailed documentation about how VM Templates and Tags work.
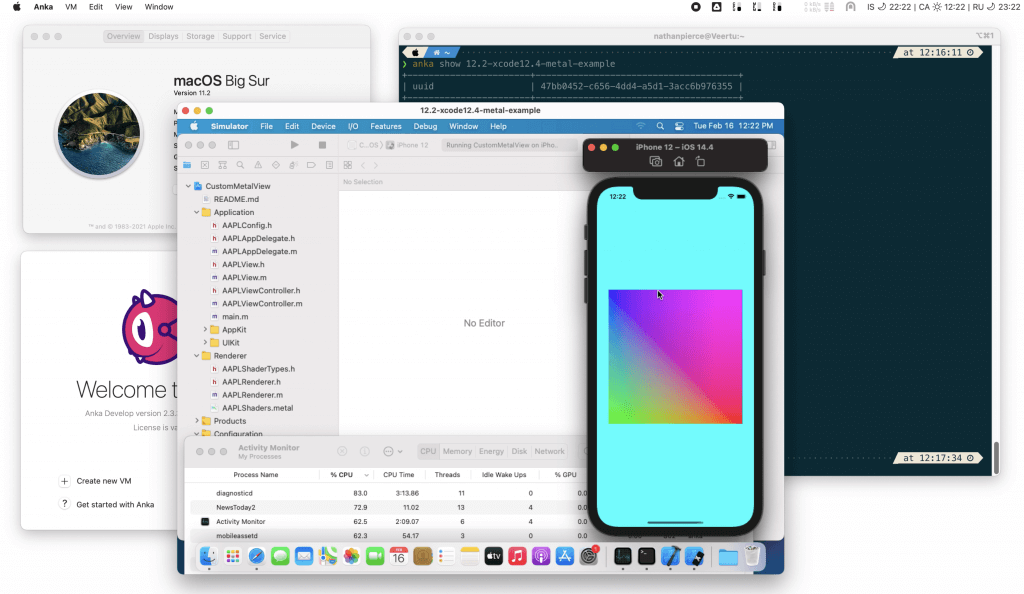
We’re going to use the Custom Metal View example code from Apple to test Metal and PG. The following video will show you how we start a VM, download the Xcode project, and then build/test the Xcode project for Metal:
